Pretty Paisley Card
I made this card to enter in 3 different challenges: the MFT Wednesday Sketch Challenge - Sketch 509, the Simon Says Stamp Wednesday Challenge: Anything Goes, and the DRU Challenge #154 - Anything Goes.
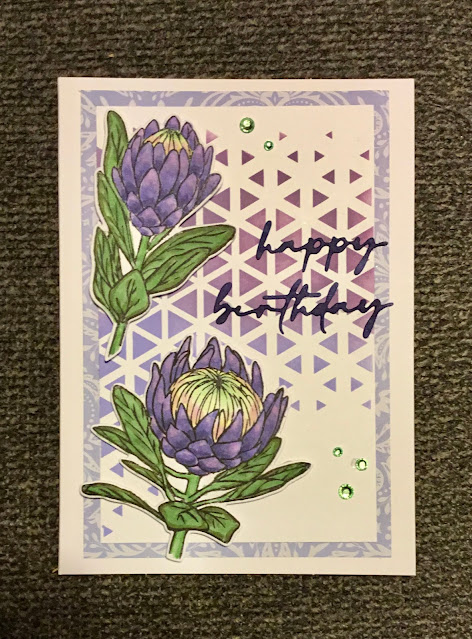
I used the Stampin' Up Paisley and Posies stamp & die set. This set is awesome! There are so many things you can do with it: create backgrounds, use it for focal points, use parts for embellishments...

I used my Cricut to cut the basic pieces for this card. From smooth white cardstock I cut a 4" x 5.25" piece and a 3" circle from which I sliced off the bottom and side.
For the black cardstock I imported a scalloped circle and sized it so it was just larger than my white circle, then sliced off the bottom & side to match. I created the card base and one of the banners to cut in black as well. I made a second banner just a bit shorter to cut from pin dot paper.
After cutting and scoring, I arranged the stamps on my stamp platform to cover the top portion of the white mat & stamped it using MFT Extreme Black. I then took off some of the stamps from the very top & arranged them on the bottom of the mat. After stamping again, I removed the mat & put in the white circle, positioning it where I would want it to attach on the final card & stamped it as well. I also stamped 3 round designs on a scrap of white paper.
Using Catherine Pooler inks in Stone Blue, Bellini, Pixie Dust, Pink Champagne (I think It's a Girl would have worked better but I don't have it yet), & Mint to Be, I colored the designs on the mat, circle, & scrap paper in roughly using finger daubers, not worrying about staying in the lines. I used Pink Champagne & Stone Blue around the edges & in open areas.
Using the coordinating dies I cut the round designs I had stamped & colored and then cut them again in black. After fussy cutting the stamped ones, I glued them together so the black edges were showing. I also die cut a lotus design from a scrap of pale yellow & inked it with Pink Champagne.
I glued the white & black circles together and attached everything to the card base. The 3 round designs I attached with foam dots for dimension. For a last touch, I went over the designs with a Zig clear shimmer pen.
Thanks for stopping by!
Sandy
Beautifully created card! Thank you for joining our challenge at Die R Us!
ReplyDeleteDiane DRU DT {Nellies Nest}