Posts

Showing posts from November, 2020

More Christmas Tags

Image
There was still some time, so I decided to try making a few more Christmas tags for the “ 25 Days of Christmas Tags 2020 ”. I made 3 more. 1. This tag was inspired by 2 from Day 17: the buffalo plaid tags w/ bears by Lindsey Larsen and the black & white checked tag with snowflakes by Karen Reategui. 2. The next one was inspired by Sara Sherlock’s tag, also on Day 17. Her coloring was so delicate & fine! I’m afraid mine is a poor imitation. I’ll be looking for some good tutorials on using watercolor pencils. 3. This last one was inspired by Tracey McNeely on Day 26. Her light bulbs were so cute and I loved the background. I didn’t have the same pattern/die as she did and I couldn’t hope to do the background right now, so I added some pine sprigs for interest instead. Thanks for stopping by! Sandy

Autumn Leaves

Image
The colors for the  SugarPea Designs Clear Stamps - Mix It Up Challenge #73 were all shades of brown & I had a leaf graphic that would look really nice using them, and some new Copic markers to try out, so I did some coloring. After coloring, I cut it with a stitched rectangle die. Next I cut a piece of bronze glitter cardstock and attached them both to a Kraft card base. I already had the sentiment strips & glued them on. Thanks for stopping by. Sandy

Multicolor Layered Ornament

Image
For the  MFT Color Challenge 154 , I wanted something seasonal, but the colors chosen weren’t traditional Christmas colors. However, Christmas ornaments come in all kinds of colors and I had found some beautiful layered ornament patterns on Etsy . So here it is: The ornament pattern had 5 layers, I used the 4 colors from the challenge and dark green. I cut them and the Merry Christmas on my Cricut. I glued all the ornament layers together and heat embossed the Merry Christmas in 2 layers of gold.  I had a leftover piece of watercolor cardstock that I had colored with green and brown Brushos. I ran it through my Cuttlebug with a Reverse Confetti Stitched Burst Cover Panel and trimmed it to size. I also cut dark green cardstock with a Papertrey Ink Fir Branches frame die.  I assembled everything on a green card base & added a red bow. Thanks for stopping by!

Let It Snow

Image
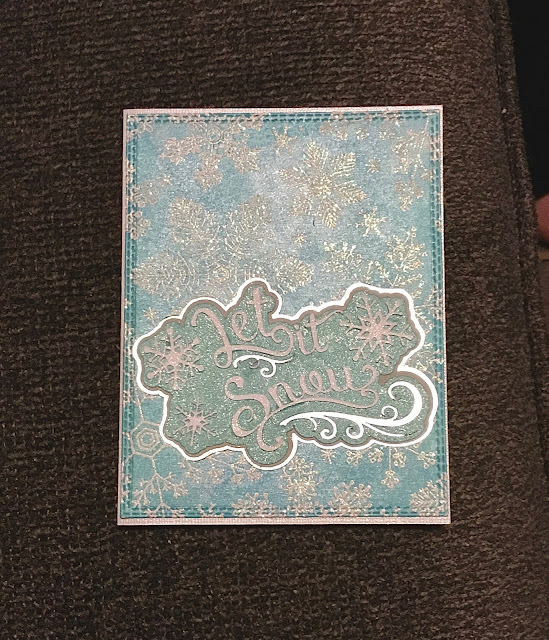
There were several challenges I was working on with this card: the  Creative Confetti: Let there be peace challenge, the Creative Confetti - Let it Snow! challenge, the MFT Stamps Wednesday Sketch Challenge - Sketch 517 , and the The House That Stamps Built - Anything Goes Challenge ~ N2520 . Personally, I’ve always found snow days peaceful - everything is shut down and the falling snow is quiet & pretty. The design I had for the Let It Snow logo also met the criteria of the MFT sketch as well. Here is the card I came up with: First, on some watercolor cardstock, I blended on a layer of Catherine Pooler Hot Tub. Next I sprayed it with a silver mica solution and added some Turquoise Brushos crystals. After swirling it around and mixing it all together, I left it to dry overnight and finished drying it with my heat gun. After using the embossing buddy, I stamped it with my Hero Arts Snowflakes Big Bold stamp using Versamark ink and embossed it using a mixture of white embossing pow

Candy Cane Deluxe

Image
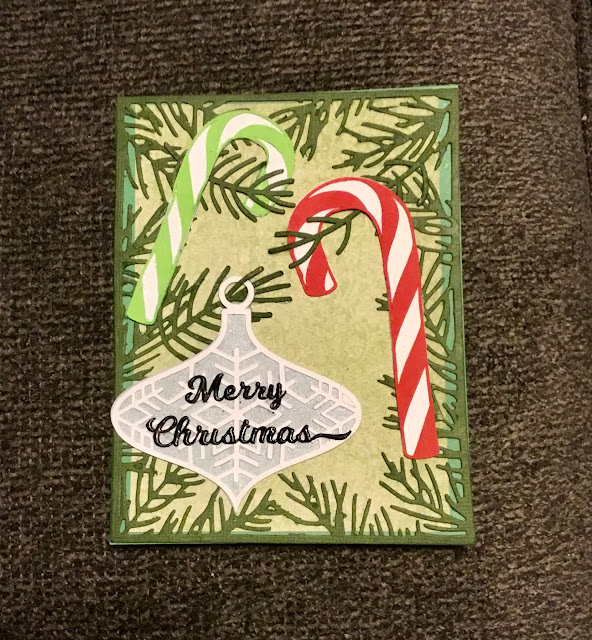
For the  Simon Says: Food and/or Drink challenge , one of the examples had a candy cane , so I thought I’d use some too. I just got a pine tree frame die & it would be perfect for that. I could make it look like a tree with candy canes & an ornament. Here’s how it turned out: I used my Cricut to cut the candy canes, ornament, some extra pine sprigs, & the Merry Christmas. The frame was die cut, and I used a scrap of green print cardstock for the backing. I embossed the Merry Christmas in black, then put everything together on a green card base. Thanks for stopping by! Sandy

Bright Flowers

Image
I typically make extras when I use Print Then Cut or cut odd pieces on my Cricut Maker, so I have them to use on future projects. So, when I saw the Creative Confetti: Just Color! challenge I went to my stash to find something to color. Next I saw the  MFT Color Challenge 153 and realized that they would be awesome colors to use in a bold floral design. There was one I had printed out a while back, so I grabbed it and my markers, and came up with this. After coloring it with alcohol markers,  I used some metallic color markers to add some accents. Next I attached it to a Kraft card base and glued on the Happy Birthday I had left from some die cutting I did last week. Lastly I added a few sequins to finish it off. Easy peasy! Thanks for stopping by! Sandy
Thanksgiving Fun

Image
  I recently finished and mailed out my Thanksgiving cards. Whew! These were a lot of work! I had planned on using a different stamp, but didn’t get it in time, so went with the Hello Bluebird Leaf Play stamp and die set that I already had. I also used some pumpkins from a Recollections little Halloween stamp and die set.  Of course, I’ll be entering some challenges as well, namely: the  Simon Says: Happy Holidays challenge, the SugarPea Designs November Meant To Be Sent - Happy Holiday challenge, the Repeat Impressions DCC N420 ~ Pumpkins challenge, and The House That Stamps Built Inspiration Palette Challenge ~ N1820 . Starting with  5”x7” Kraft card bases, and 4.75”x6.75” black mats, I cut 4.5”x6.5” pieces of watercolor paper. I then used the spray starch and Brushos technique, with the orange and lemon colors, to create the backgrounds. I wanted it to be bright and cheerful. Using MFT Extreme Black, I stamped the images on alcohol ink paper, colored them in, and started die cut

Embossing Hits & Misses - Part 2

Image
So the story continues... Next up is the card I made for the  MFT Wednesday Sketch Challenge - Sketch 515 . Here is the sketch. I decided to do something I thought was clever (& it still might work with better stamp/color choices & execution). Instead of using different colors of paper or elements, I would emboss the whole page, cut it into pieces to match the sketch, and ink blend them in 4 different shades of the same color. I would then reassemble it on a backer mat & glue it together, kind of like a jigsaw puzzle. It’s a busy mess, I know. To begin with, this was a poor choice of stamps  The brocade was just too busy and irregular. It didn’t stamp clean and, so, didn’t emboss clean. The colors were too close, so it was difficult to see the differences. I then tried to save it by adding on a couple of die cut flowers, which didn’t work. Also again: ink first, embossing second, use an embossing buddy.  Finally, my fourth card was one I made for  MFT Stamps -The Birthday

Embossing Hits & Misses

Image
I made 4 new cards this weekend, and I hate to say that only one turned out well. I did a lot of white embossing and it seems to be a bit pickier than anticipated.  The first card was for the  Simon Says: Remembrance/Thinking Of You challenge . I decided to go with my big flourish stamp embossed in white with a background of tan blending into turquoise. Not only was the embossing messy, but the blending did not turn out well at all. The cards I saw that I was inspired by had taken a pen of some sort and added sketching to the flourish. It really added to the look. However, my pen was too fat. Lessons: do the ink blending first so you have better control, don’t forget to use your embossing buddy, and don’t try sketching on an embossed image with an alcohol ink marker (I’m not sure what to use yet, but I’ll be researching it). My second card was for the  Lavinia World Challenges #39 - Anything Goes . This is the one card I ended up liking. I used the Saran Wrap method, but instead of ink

Aqua Snowflake

Image
Just a quick note about my latest card, which I made for the  MFT Wednesday Sketch Challenge - Sketch 514 and the Simon Says: Thinking Of You challenge . I ended up having to redo things a number of times & change my plans somewhat, but that’s what keeps it interesting isn’t it? Here’s what I ended up with. I took a  2 1/2” x 5 1/2” piece of white cardstock & embossed it in white with a Hero Arts Snowflake Bold Print stamp. I then blended Catherine Pooler It’s A Boy ink over the top, which is where I ran into one problem. Rather than a baby blue color, the ink was a pale aqua. I had already cut out the layered snowflake using bluer colors and a card base of a dusty medium blue, so I cut a new card base of a pale aqua/mint green shade, and went over the stamped piece with Brilliance Moonlight White ink to tone it down.  I had planned on cutting strips of snowflakes attached together like a ribbon but couldn’t get any of my designs to cut well, so I cut several strips of vellum

Goodbye Mum

Image
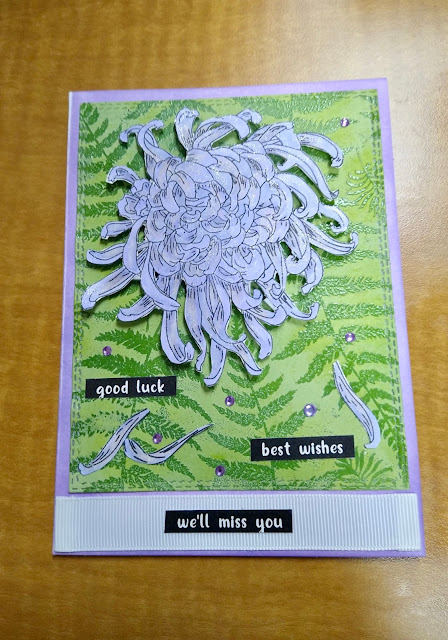
I needed a goodbye card for a woman at work who was leaving for another job. Chrysanthemums are fall flowers and so seemed to be fitting for the occasion.  I made a 4”x6” card so there would be more room for people to sign.  After blending Catherine Pooler Grass Skirt on a piece of white cardstock, I stamped it with Versamark ink using the largest fern in the Moodtape Ferns & Leaves stamp set & embossed it with Nuvo Fine Detail clear powder. I then blended Hero Arts Unicorn White ink over it and buffed it with a microfiber cloth. Next I stamped Power Poppy Chrysanthemum XL on some alcohol ink marker paper and colored it in with my markers. I fussy cut it and the falling petals out with scissors and an x-acto knife. I blended the front of a 4”x6” white card blank with Catherine Pooler Pixie Dust and attached the backing with a Tombow tape runner. I attached the chrysanthemum with foam squares and glued on the petals. There was too much space at the bottom so I took a piece of wh

Shimmery Flowers

Image
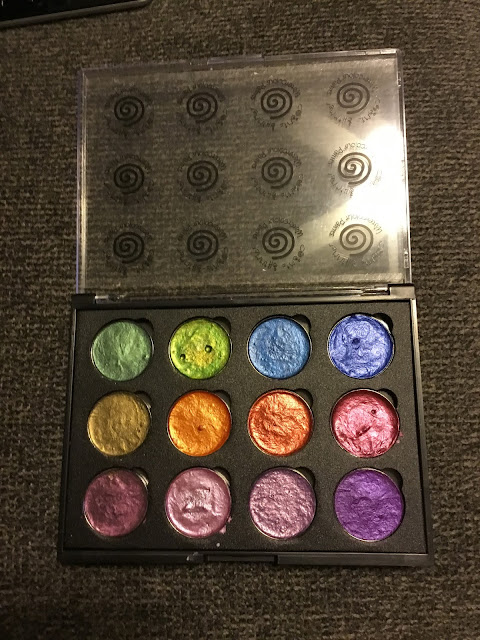
For the  MFT Stamps Wednesday Sketch Challenge - Sketch 513 , I wanted to try my new Cosmic Shimmer Watercolors. These colors are so amazing! They’re rich and have a gorgeous shimmer.  I have the Antique Shades set, which has some really pretty greens, mauves, and purples, so I thought a flower bouquet stamp would work well. Here’s the finished card. After embossing the stamp in gold on watercolor cardstock, I painted it using the Cosmic Shimmer set and buffed it a bit with a microfiber cloth to uncover the embossing. I then die cut it using a stitched rectangle.   I had a leftover piece of cardstock that I had blended completely over with Tsukineko Brilliance ink in Galaxy Gold and then decided not to use. However, I thought it would work well for this project, bringing out the embossing, so I die cut it with a larger stitched rectangle.  Once I attached the flower card at an angle using a Tombow tape runner (I like the pink one), I trimmed off the excess and attached it to a dusty r