Posts

Sympathy & Blues

Image
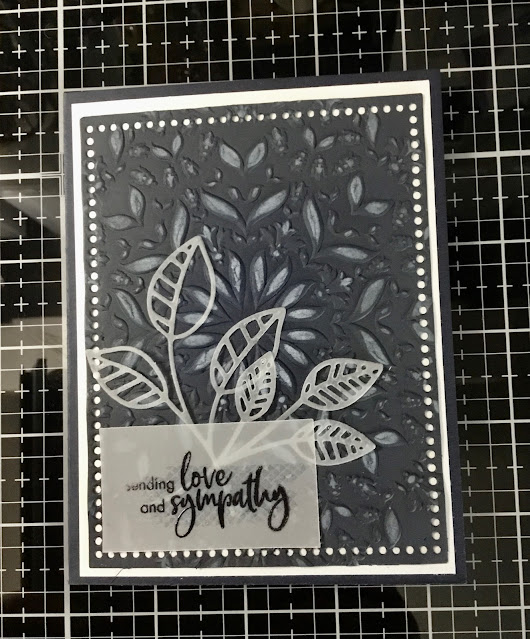
Recently, I’ve needed a couple of sympathy cards, unfortunately, so my stash is gone.  I made 2 of the same thing to save some time to replenish it.  I started with navy blue cardstock cut to 5.5”x4.25” and blended some Distress Oxide Black Soot around the outside to create a bit of shadow. I wiped the back with a baby wipe and ran them through my Cuttlebug using an Altenew Charming Mandala embossing folder. Next I used a brayer and some Hero Arts Unicorn ink lightly across the top to highlight the design. Afterwards I die cut them with an Altenew Mix and Match frame die.  Using some vellum I also die cut some leaves using Altenew's Flowing Foliage set. I used a sentiment from the Hero Arts Protea Flower set, stamping on some vellum with black archival ink and embossing with clear powder.  I used a white mat on a navy card base and attached the embossed background. Last I attached the vellum leaves and sentiment with a tape runner.  These turned out really well!...

Stars & More Stars

Image
  I decided to go with a theme of stars and to make my first shaker cards for the 4th. I found the small star shaker dies and the Paper Rose Star texture die and thought I could do something with them. This is what I came up with.  They look deceptively simple, but I cut 120 of the stars out which took a looonng time. The little stars inside came from Buttons and Things. Aren’t they cute? They sealed the idea for me.   I’ll be entering this in the  Simon Says Stamp Monday Challenge - Simon Says: Something Beginning With ‘S’ , Simon Says Stamp Wednesday Challenge - Simon Says: Clean And Simple , and the DRU Challenge #195 . Thanks for stopping by!

Father’s Day 2022

Image
For Father’s Day this year I pretty much copied a card from   Norene Borys for Altenew . It involved some techniques I haven’t used before and I learned a lot. It actually took me 3 tries to get them to turn out good enough to send. Here’s mine: I haven’t done much with masking before, so this was a learning experience. It wasn’t as difficult as I thought it would be.  I’m not much of an artist, so the extra leaves & the watercoloring aren’t as good as I’d like, and I didn’t add any sketching on the bird itself. It’s a cute stamp, and overall I’m happy with how it finally turned out.  I’ll be entering this in the  Simon Says Stamp Monday Challenge - Simon Says: It’s Up In The Air , the Simon Says Stamp Wednesday Challenge - Simon Says: Little Critter s, and the Stamping Sensations June Challenge- ****Make it Masculine**** . Thanks for stopping by!

Bright Flowers

Image
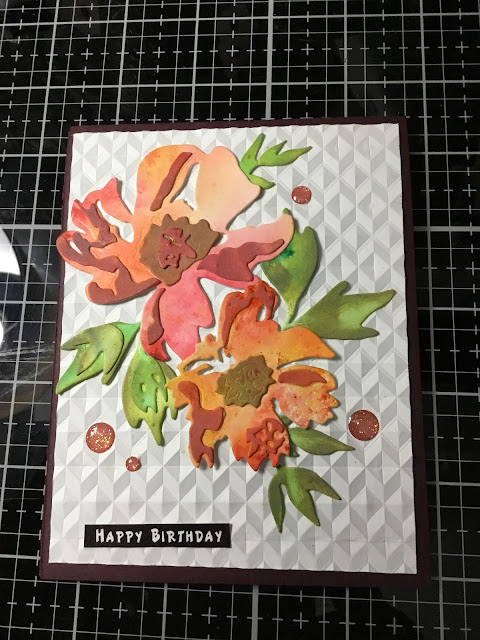
The Simon Says challenges for the week were  Simon Says Stamp Monday Challenge - Simon Says: Add Texture and  Simon Says Stamp Wednesday Challenge -  Simon Says: Layer It Up , so I created another card that I could use on both. I recently got the Sizzix Brushstroke Flowers #1 Thinlits Die Set and decided to use some of my Brushos with them.  I used three 4.5”x6” pieces of watercolor paper and sprinkled one with greens, one with reds & oranges, and the third with oranges and yellows, then spritzed them with water. I let the colors swirl around a bit then let them dry overnight.  The next thing I did was use the dies to cut the leaves from the green, the large flower from the red, and the smaller flower from the orange paper. I colored some of the pieces with Distress Oxides using small sponge blenders and then glued them all together. Using the Altenew Angled Mosaic embossing folder, I embossed a piece of A2 cardstock and trimmed it down 1/4”. I then attache...

Pretty in Pink

Image
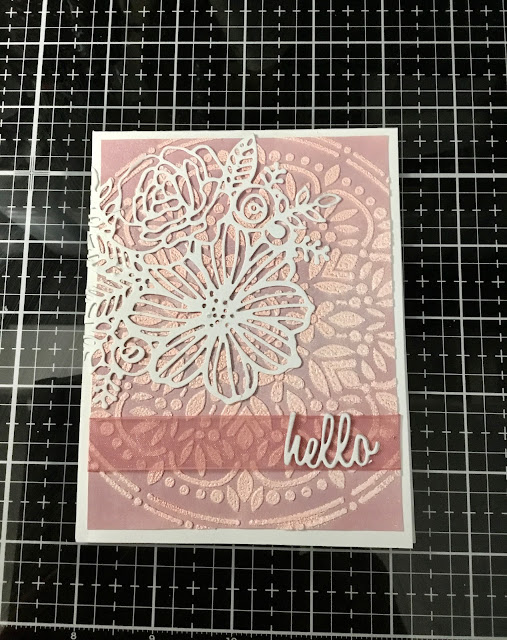
For the  Simon Says Stamp Monday Challenge - Simon Says: Add Texture I decided to use a stencil and modeling paste to create texture. I’ve had some good luck with adding embossing powders to the modeling paste, getting really interesting looks. I looked through my embossing powders and found a Ranger Blush Pearl powder that I don’t think I’ve used before, so I went with it. I’m trying to go through my supplies and use things I haven’t used before. On that same note, I have a Simon Says Stamp stencil, Spring Boho Circle, that I haven’t used before either, so took that out. I began with a piece of 4.25 x 5.5” white cardstock and blended Distress Oxide Victorian Velvet over it. Next I spritzed some water on it and dried, then spritzed some Avery Elle shimmer spray over it and dried. That gave me a shimmery textured background which I taped my stencil over, then spread Liquitex light modeling paste over the stencil using a palette knife. When I removed the stencil I had the stencil...

Memorial Day 2022

Image
I love poppies! So when it comes to Memorial Day I tend to turn to them. This year I used Paper Rose’s Modern Poppy stamp.  Since I was making multiple cards, and I didn’t want to use up my Copic markers, I purchased the Nuvo  Creative Pens Rich Reds set on sale. It’s a good thing since I used them all up. Now, I did a number of things wrong here. First I stamped the design using Ranger Archival Ink in black. I used clear embossing powder over that, so here are 2 no-no’s. Archival ink is a pigment ink so it’s not safe for alcohol ink markers, it will smear, and you’re not supposed to use markers with heat embossing as it can ruin your markers. I hoped the clear embossing would help prevent the smearing, and it did for the most part. Also, I wasn’t planning on keeping the red markers so I didn’t care so much about the embossing.  I did use my Copics for the greens and yellow and they seem to be ok.  The paper I used was Hammerhill Premium Color Copy 80lb. Cover. ...

Happy Cats

Image
I needed a masculine birthday card so, after looking through my collection, I decided to use an argyle stencil set from Pinkfresh Studios, and a Stampendous Laurel Burch stamp. For the argyle stencil I used Distress Oxide inks in Faded Jeans, Weathered Wood, and Shabby Shutters. It turned out smaller than I thought it would but you could go back and move the stencils over to make it a bigger size if you wanted to.  I decided to use it as a focal element instead of a full background so it was fine.  I stamped both the single and triple cats from the Stampendous stamp set “Feline Blooms, and the Happy Birthday sentiment as well, using Ranger Archival ink in black. I colored in the cats using Copic markers and then fussy cut them. I trimmed the sentiment into a strip.  On an A2 medium gray card base, I used a tape runner and attached the argyle mat. The cats were mounted using foam dots, and then the sentiment strip with tape runner. I added some enamel dots in several color...