Posts

Flourishes & Foliage

Image
The third card I made this weekend is a birthday card for my niece.  One of my favorite stamps is the Inkadinkadoo Flourish.  It’s so versatile! So I pulled it out again for this card, using it to do an emboss resist with White Detail Hero Arts embossing powder.  I decided on a palette of blues & greens,  so I used Distress Oxide inks in Stormy Sky, Chipped Sapphire, Bundled Sage, & Rustic Wilderness to blend over the embossing. I then used the Tiny Birthday by The Ton to stamp offset a couple of times with Catherine Pooler Juniper Mist ink.  I buffed off the excess ink.  Next I die cut a rectangular frame and several pieces of foliage from the Altenew Flowing Foliage set. I arranged these on top of the background & glued in place.   I’m not going to add a sentiment letting the Tiny Birthday stamp serve that function. I added some sparkle dots to finish it off.  Here it is. I like the layered look of it!  Thanks for stopping by!...

Sweater Weather

Image
This cute stamp & die set is the Knit Together bundle from Stampin’ Up.  It’s not the easiest set to use, but it sure is cute!  Since I’m making this card for my brother-in-law’s birthday I went with more masculine colors.  I used blue on blue for the stamping, then added the die strips and cut.  The small snowflakes didn’t cut very well, so I figured I’d add some dots from Nuvo Drops in red & blue to cover the bad spots.   After cutting strips of the different colors of cardstock and gluing them to the back of the sweater card, I trimmed them to the edges.  Next I stamped the sentiment on light blue cardstock with Ranger Archival Jet Black ink and used clear embossing powder to finish. I attached it to a blue card base, attached the sentiment & I was done. I didn’t end up using the Nuvo Drops after all. I just used a dark blue fine tip marker to touch up the small snowflake row.   Not bad, if I do say so myself. Thanks for stopping by!...

Valentine’s Day 2022

Image
 I wanted to make a special card for my husband for Valentine’s Day.  After seeing a tutorial by Bibi Cameron I wanted to try her method for making the background. Isn’t this gorgeous?  I decided to use the Altenew Floating Foliage embossing folder and a darker greener palette.  I started by rubbing Distress Oxide Iced Spruce on the debossed side of the embossing folder, spritzed it with a little it of water, and ran it through with photography paper. After letting it dry, I put a couple of smudges of Distress Oxide Speckled Egg and spritzed it again, tipping it so the ink flowed around the raised portions of the design.  Once that was dry I used Distress Oxide Black Soot to lightly swipe the leaves. I then spritzed some Lindy’s Mystic Malachite Vintage Spray and some DistressOxide Antique Linen spray. I spritzed with water and moved the colors around a bit. After this was dry, I swiped the leaves with Tsukineko Brilliance ink in Galaxy Gold.   With gold m...

Pink Hearts

Image
It’s been a long time, I’ve been working on my craft room and doing some crochet. The husband is on board with what I want to do in my room but it’s going to take most of the year to get it done. I have the second part of my desk and a bookcase coming in the next day or two. My pegboards, shelving, and racks for the stamp holders are all up & in use. Hopefully I’ll be at a place where I can have things stored in a way I can find them!   I haven’t made any cards since Christmas so I definitely wanted to do something for Valentine’s Day.  I decided on a pale pink shimmery palette. Using watercolor paper I stamped the Altenew Bouquet of Love using Versamark ink and embossed with Hero Arts White Detail embossing powder. Next I spritzed it using Lindy’s Stamp Gang Starburst Sprays in Alpine Ice Rose and Salt Water Taffy. With a brush I used mauve watercolor, from the Brea Reese Travel Watercolor kit, to paint in some areas to add interest. After spraying the whole thing with Av...

Merry Christmas!

Image
It’s been a long time. Between starting a new job and working on setting up my craft room/office I haven’t had time to do much in the way of making cards. I did do Halloween cards, it’s posted on my Instagram page, but it took a long time to get these Christmas cards made. As usual, they were much more work than I anticipated!  I had seen many cards posted on Pinterest using the Stampin’Up Snowflake Sentiments Bundle. Gorgeous!! I managed to find a set and figured out a design.   I wanted something in blues this year,  so I went with a navy base, and I found this adorable Carta Bella print on Scrapbooks.com . Using vellum along with the glitter paper add elegance with sparkle. So Christmassy! The rest came together after that.  The most difficult part was that the dies were sized for A2 cards and I wanted an A7 size. I got around that by cutting the strips of vellum and glitter paper to 6-7/8” long then cutting them twice, once with the full length die and then again...

Pale Blue & Silver Brocade

Image
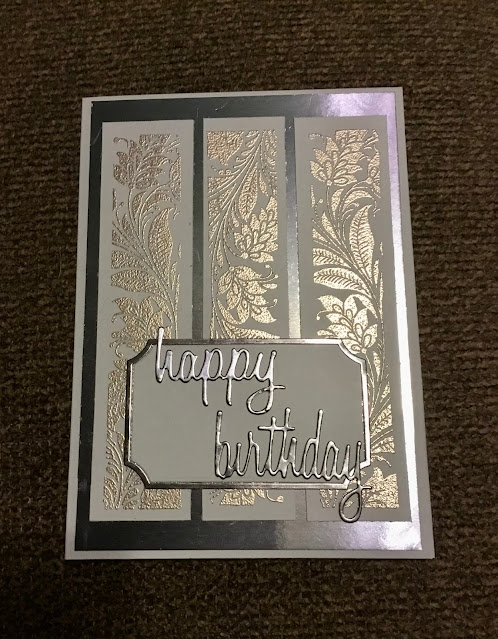
This is the last card I finished today, it uses the Gina K Holiday Tapestry stamp set. I love the brocade look of this band included with the set. I chose a lightish blue for my primary color.  I stamped the band 3 times using Versamark ink and embossed in silver. I then trimmed around the edges. The label is from the Stampin’ Up Painted Labels die set. I cut it twice, once from plain blue cardstock and once from blue mirror cardstock so I could get the shiny frame around it. The mat and sentiment were both cut from the mirrored blue cardstock (Sizzix Tim Holtz Celebration Words die set). I put it all together and was done.  This card, I mean, wow, right? I’m very happy with how it turned out. I don’t want all my masculine cards to be nautical or mechanical. I think this works just fine for a man.  I’ll be entering this card in the  Simon Says: Stamp It challenge, The House That Stamps Built - Theme Challenge S821 ~ Let’s See Your Sparkle and Shine , and the Simon S...

Seafoam & Purple

Image
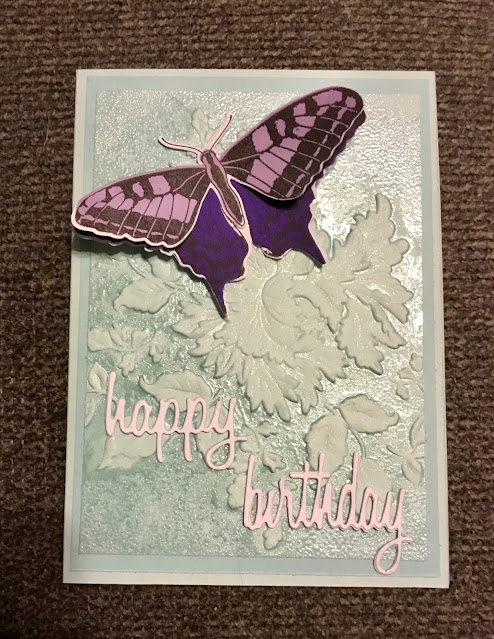
Here’s another one of the birthday cards I just finished. This one uses the same embossing technique as my succulent card but with clear embossing powder instead of gold. The embossing folder is the Altenew 3D Majestic Bloom folder.  I stamped and die cut the layered butterfly using Altenew’s Dovetail Butterfly set with 2 shades of purple ink.The sentiment I die cut 3 times in white using the Sissix Tim Holt Celebration Words set, gluing them together. Last I attached the butterfly & was done. Isn’t this card pretty? I’m loving the shimmer and shine from this embossing technique! It’s definitely staying in my repertoire.  I’ll be entering it in the  DRU Challenge #176- ANYTHING GOES , the Simon Says: Stamp I t challenge, The House That Stamps Built - Theme Challenge S821 ~ Let’s See Your Sparkle and Shine , and the Simon Says: Sparkle & Shine challenge. Thanks for stopping by!