Posts

Pink Posies

Image
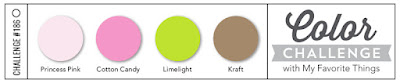
This week I made a card to go with a number of challenges. The colors I used came from the MFT Color Challenge 186 .   The layout is from the MFT  Wednesday Sketch Challenge - Sketch 586 . I used 2 different sets of Altenew dies, Mix and Match Frames and Itty Bitty Flowers, as well as a Happy Birthday die I had in my stash. I also used some sparkly enamel dots in 2 colors of pink.  I think this definitely qualifies for the  Simon Says Stamp Monday Challenge - Simon Says: Bright and Cheerful and the Dies R Us Challenge - DRU Challenge #189 - Anything Goes . Thanks for stopping by!

Deepest Sympathy Daisies

Image
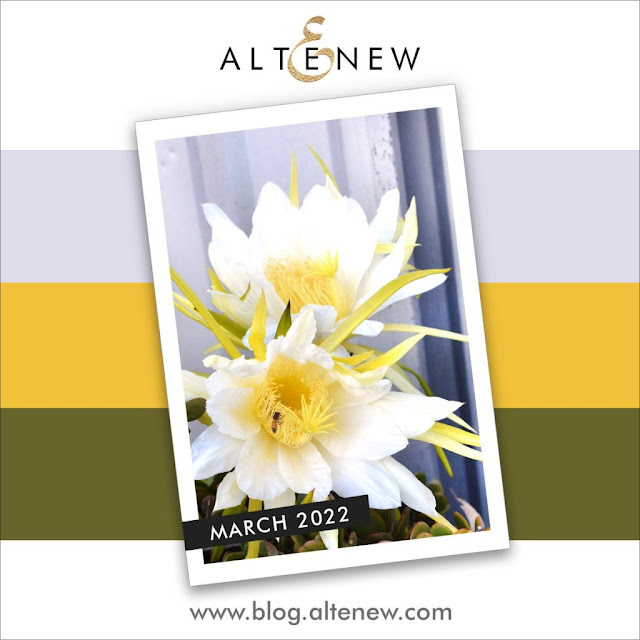
I made another card for the Altenew March Inspiration Challenge since the last one didn’t use any Altenew products in it. This time I used their layered Daisy Die Set. By using this set I am also able to use this card in the Dies R Us Challenge #189 .   As a reminder, here is the inspiration for the Altenew challenge. Since I don’t have a Sympathy card in my stash, I decided to make this one.  I used lavender, green and metallic gold on this card. To begin, I sprayed lightweight watercolor paper with Lindy’s Starburst Spray in Opal Sea Oats, a golden shimmery color, then spritzed some water over the top of that so I could move it around the paper until it was well covered. Using my heat gun I dried it and then die cut the bottom layer of the daisies and the top layer of the centers out of it 3 times.  Next I die cut the top petal layer in white, the bottom of the leaves in a green-gold shimmer background I had in my stash, the the middle & top layers of the leaves in...

Hydrangea Highlight

Image
The second card I made today was specifically for the  Altenew March 2022 Inspiration Challenge , although I used Colorado Craft Company stamp for it. I had pulled out their Big Hydrangea stamp set to use a sentiment from it so just used the hydrangea part for this. Here is the inspiration picture from Altenew. I went with the colors for this card, as close as I could get, and did a sort of color blocking effect. I’ve seen it before on other cards and thought it looked nice and easy. I started by stamping the hydrangea in black ink on a 4-1/4” x 6” piece of white cardstock. After masking off the edges with low tack tape (I actually used blue painters tape) I masked off the bottom third of the center and blended on Distress Oxide Peeled Paint, masked off the middle portion and used DO Mustard Seed, and used DO Milled Lavender on the top. Using a script Happy Birthday die, I cut it 3 times in white and once in black. After gluing all 3 white pieces together I glued the black piece o...

Spring Foliage Mixed Media

Image
Well, I finally got back to card making today and this one came out really pretty. I used this palette again, but only four shades, two green and two blue. This is one of my favorite color combinations.  I started with a 4-1/4”x6” piece of white cardstock and blended on Distress Oxide inks in Stormy Sky, Chipped Sapphire, Iced Spruce, and Rustic Wilderness.  Then I taped a stencil down over it, the Lavinia Stamps Bud Stencil, and spread light modeling paste over it evenly with a spreading tool.  You could also use a palette knife. I then carefully peeled up the stencil and set the design aside to dry.  While it was drying I cut the Pinkfresh Foliage Frame inset die out of white cardstock. On vellum, I next stamped the sentiment using Ranger Archival Ink in Jet Black, then embossed it with Stampendous fine detail clear embossing powder, and trimmed around it with scissors. I got the sentiment from the Colorado Craft Company Hydrangea big stamp set.  Once the mode...

Flourishes & Foliage

Image
The third card I made this weekend is a birthday card for my niece.  One of my favorite stamps is the Inkadinkadoo Flourish.  It’s so versatile! So I pulled it out again for this card, using it to do an emboss resist with White Detail Hero Arts embossing powder.  I decided on a palette of blues & greens,  so I used Distress Oxide inks in Stormy Sky, Chipped Sapphire, Bundled Sage, & Rustic Wilderness to blend over the embossing. I then used the Tiny Birthday by The Ton to stamp offset a couple of times with Catherine Pooler Juniper Mist ink.  I buffed off the excess ink.  Next I die cut a rectangular frame and several pieces of foliage from the Altenew Flowing Foliage set. I arranged these on top of the background & glued in place.   I’m not going to add a sentiment letting the Tiny Birthday stamp serve that function. I added some sparkle dots to finish it off.  Here it is. I like the layered look of it!  Thanks for stopping by!...

Sweater Weather

Image
This cute stamp & die set is the Knit Together bundle from Stampin’ Up.  It’s not the easiest set to use, but it sure is cute!  Since I’m making this card for my brother-in-law’s birthday I went with more masculine colors.  I used blue on blue for the stamping, then added the die strips and cut.  The small snowflakes didn’t cut very well, so I figured I’d add some dots from Nuvo Drops in red & blue to cover the bad spots.   After cutting strips of the different colors of cardstock and gluing them to the back of the sweater card, I trimmed them to the edges.  Next I stamped the sentiment on light blue cardstock with Ranger Archival Jet Black ink and used clear embossing powder to finish. I attached it to a blue card base, attached the sentiment & I was done. I didn’t end up using the Nuvo Drops after all. I just used a dark blue fine tip marker to touch up the small snowflake row.   Not bad, if I do say so myself. Thanks for stopping by!...

Valentine’s Day 2022

Image
 I wanted to make a special card for my husband for Valentine’s Day.  After seeing a tutorial by Bibi Cameron I wanted to try her method for making the background. Isn’t this gorgeous?  I decided to use the Altenew Floating Foliage embossing folder and a darker greener palette.  I started by rubbing Distress Oxide Iced Spruce on the debossed side of the embossing folder, spritzed it with a little it of water, and ran it through with photography paper. After letting it dry, I put a couple of smudges of Distress Oxide Speckled Egg and spritzed it again, tipping it so the ink flowed around the raised portions of the design.  Once that was dry I used Distress Oxide Black Soot to lightly swipe the leaves. I then spritzed some Lindy’s Mystic Malachite Vintage Spray and some DistressOxide Antique Linen spray. I spritzed with water and moved the colors around a bit. After this was dry, I swiped the leaves with Tsukineko Brilliance ink in Galaxy Gold.   With gold m...