Posts

Today’s Tiles

Image
I made a card for the  Creative Confetti: Birthday Wishes challenge , and thought to enter it in 2 more Anything Goes challenges ( Simon Says: Anything Goes & The House That Stamps Built  - Anything Goes Challenge ~ O2820 ). I haven’t had a chance to use my Stampin’ Up Today’s Tiles stamp set & decided to use it for this card. I used Versamark ink and heat embossed the 2 parts of the design in Stampendous detail black and Lindy’s Stamp Gand Weeping Willow Green Gold on white cardstock. I trimmed them down and matted them on black. The small square I attached using an aqua pearl brad, and added the sentiment which was embossed in black too. Thanks for stopping by! Sandy
Autumn Wishes

Image
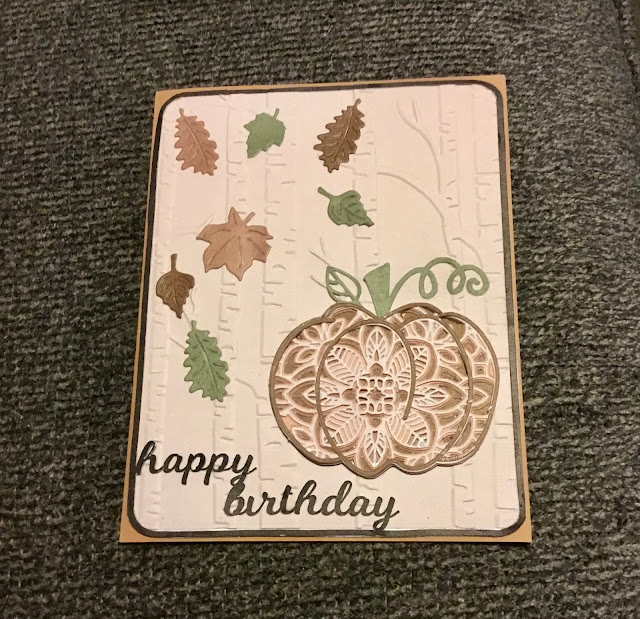
I made this card to fit 4 challenges: the  Creative Confetti: Emboss Like a Boss , the Altenew October Inspiration Challenge ,  The House That Stamps Built - Tic-Tac-Toe Challenge , and the Simon Says: Movie Inspiration Challenge . I needed a birthday card with an autumn forest, embossing, a frame, and that reminds me of a movie. Given the time of year, I thought of the movie “Practical Magic” and a magical fall theme. Here’s what I came up with. I found the mandala pumpkin design online (it’s kind of magical, isn’t it?), as well as a different version of the frame, that I made into a birthday frame. After cutting all the parts out on my Cricut, I embossed the background. Then I die cut leaves from scraps of the paper used to make the pumpkin. The background was attached to a slightly larger piece of white cardstock and the frame glued around the edge, then the corners trimmed to fit the frame. After gluing the pieces of the pumpkin together, I attached it to the background,...

Another Halloween Card

Image
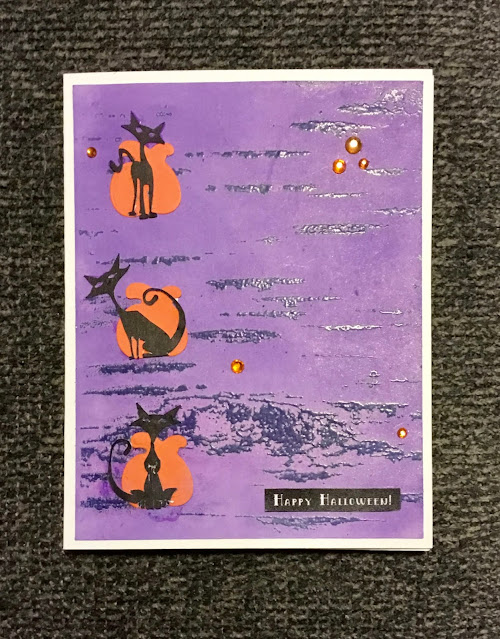
For the  SugarPea Designs Mix It Up Challenge #72 I thought 3 black cats would be fun. After all, my own Bunny Bear is a black kitty and she deserves some love!  Using the colors purple, orange, black, and white I came up with this. I just got the Stampin’ Up birch bark stamp & decided to use it for the background with Catherine Pooler Queen For A Day ink and the trapped emboss resist technique.   Next I downloaded some cute black cat images and cut them with my Cricut Maker. I also used the Print then Cut feature to make the sentiment.  After die cutting the pumpkins from orange cardstock, I assembled it all on a white card base & added some orange rhinestones. I also entered this in the  DRU Challenge #155 - Boo! and the Simon Says: Layer It Up challenge. Thanks for stopping by! Sandy

Layered Mandala

Image
For the  Simon Says: Layer It Up challenge, what better to use than a layered mandala? I’ve had this SVG pattern for a while & decided this was a perfect time to use it. It also worked great for the Power Poppy Creative Confetti: Sketch It Out! challenge. Here’s my card. Using my Cricut Maker, I cut the mandala layers from black, charcoal, medium gray, light gray and white cardstock. I then cut a piece of light gray cardstock to 4” x 2 5/8” and the card base from a darker gray.  Next I die cut the Happy Birthday from black cardstock and heat embossed it. After assembling the mandala, I glued all the components together and added some black rhinestones.  Unfortunately, the glue on the “Birthday” smeared and I wasn’t able to remove it with my rubber eraser like normal. I’ll probably take off the mandala and redo the rest when I have a chance. I do like the look of this card but maybe I’ll use a smaller Happy Birthday die next time so I can center the mandala better....

Red & Green Are Not Just For Christmas!

Image
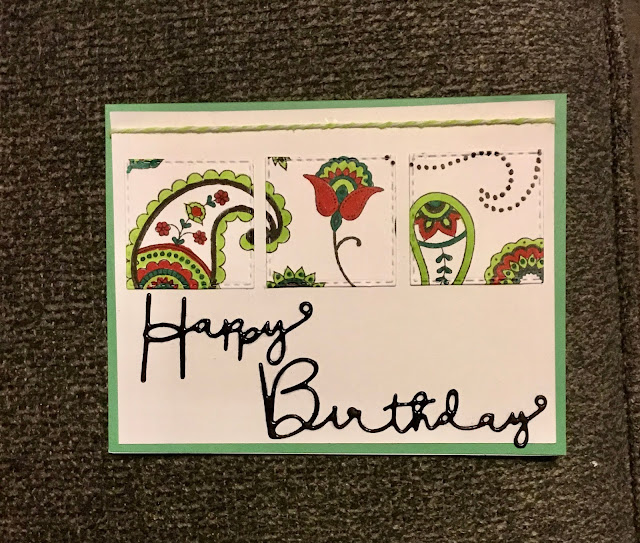
Using the colors from the  MFT Color Challenge 151 & the prompt from The House That Stamps Built  Designers Choice Challenge  O720 ~ Less Is More , I made this card. Using the Stampin’ Up Paisleys & Posies set I stamped a random grouping on a scrap of white cardstock and colored them with alcohol ink markers. Then I cut 3 squares in a row using a stitched square die.  Next, after die cutting the Happy Birthday from black cardstock, I embossed it twice in black. Once I attached the squares & words to a white mat, I decided the placement was off so I added a piece of twine across the top to balance it out and put it on a green card base. Thanks for stopping by! Sandy

Autumn Sunset Colors

Image
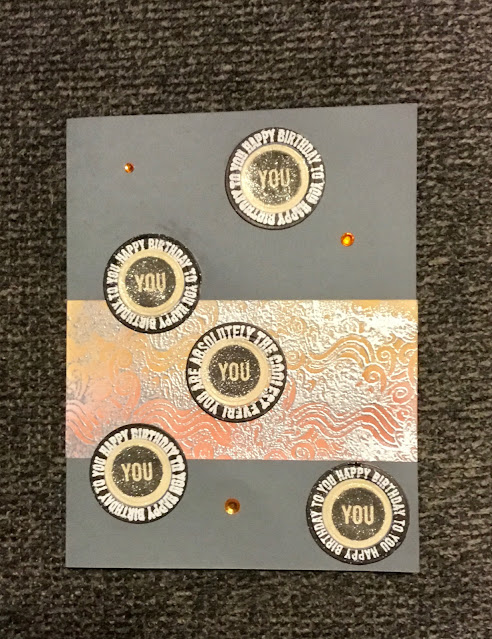
Here again I combined 2 different challenges and created a card to fit both: the  MFT Wednesday Sketch Challenge - Sketch 512 and The House That Stamps Built - Inspiration Palette Challenge - O2120 . By mixing the sketch from one with the colors from the other, this is the card I came up with. First, I made a base from gray cardstock and cut a piece of white 4 1/4” x 2 1/2” . I used Versamark ink to stamp the piece of white cardstock using a wavy background stamp and embossed it in silver. Next I blended Catherine Pooler Bellini and Tiara inks onto it and buffed the top with a microfiber cloth to remove the ink from the embossing. Next I used the Simon Says Love Tokens stamp & die set to stamp the ring sentiments with Versamark ink and embossed them in white. After stamping the center portion in black ink on butter yellow cardstock, I die cut them all using the coordinating dies. Then I went back over the embossing with a white gelli pen where some of it was damaged during c...

Boo!

Image
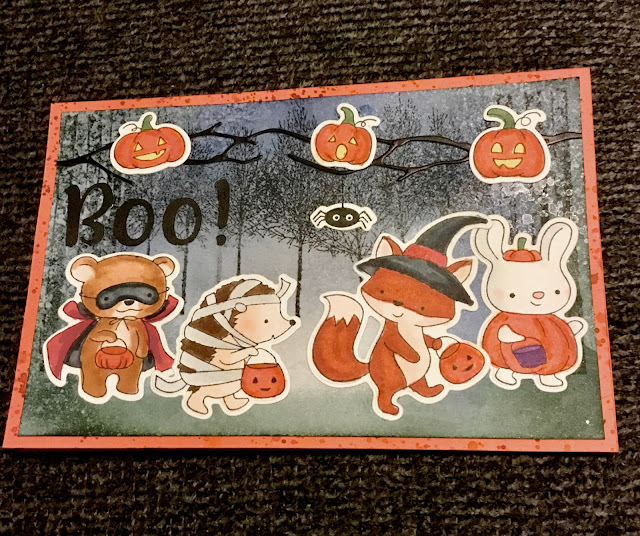
I was so excited to make Halloween cards for the first time! The problem was deciding which of the many adorable stamps to use, but I just fell in love with Hello Bluebird’s Little Haunters. They are so cute!  There are a few challenges I will be entering them in:  the  Simon Says Stamp Monday Challenge: Spooky , the Stay Crafty With Hero challenge - Fall & Halloween , the DRU Challenge #155 - Boo! , and the Sugar Pea Designs October Meant To Be Sent Challenge - Fall Holiday theme . I wanted a dark forest background, and it was a lot of work to create, but I love how it came out. Here is the finished card (I made 8 of them). For the background I started with a 3 3/4” x 5 3/4” piece of white cardstock (these are 4x6” cards). I had some of the resist spray left from last week so I spritzed it on, dried it with my heat tool, then added some CP Twilight in a half circle on the bottom middle of the card using a sponge blending tool. I then spritzed again, dried, and added ...