Posts

Fresh Blooms

Image
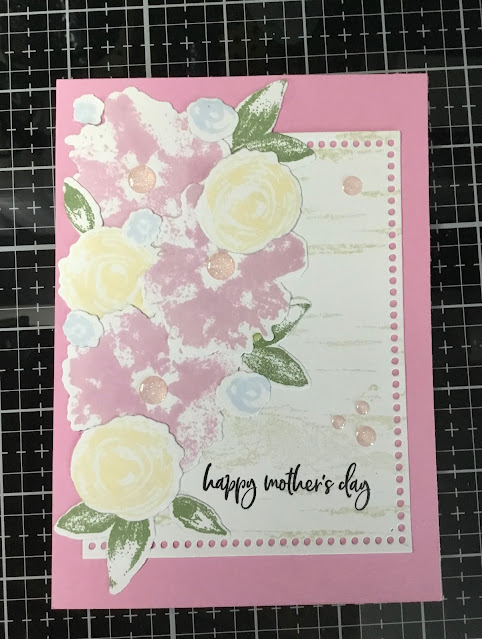
With Mother’s Day coming up I needed to make a special card. I decided to use the Altenew Fresh Bloom layering set (a gift from a friend). I haven’t used it before although I’ve had it for a while. I ordered the coordinating die set recently.  Since I also needed to make a birthday card, I just switched colors for the second card.  For the first card I used Catherine Pooler inks in Bellini, Polished, Coral Cabana, and Tutti Frutti.  The flower centers were stamped in Limoncello, Shea Butter, and Tiara. For all the leaves I used Sage, Eucalyptus, and Spruce. For the flowers for the second card I used Hot Tub, Aquatini, Skylight, and Mardi Gras.  Next I cut out the flowers and leaves with the coordinating dies.  For the background I did some hot foiling. This was my first attempt with my new Spellbinders Glimmer Hot Foil machine.  I actually got it a few months ago but wasn’t able to use it since it didn’t fit on my Cuttlebug.  I had to get  a Spell...
Meadow Thanks

Image
I needed to make a couple of Thank You cards today, so I pulled out my Altenew Meadow Burst Stencil Set.  I thought I could make something to enter in the Altenew April Inspiration Challenge .  I used Catherine Pooler inks in Lime Rickey, Sage, Eucalyptus, and Spruce, and Scrapbook.com inks in Havana Red and Cardinal Red.  The stenciling was done on Neenah Classic Crest Solar White 110 lb. cardstock using ordinary blending brushes. I started with a piece sized at 4 1/4 x 5 1/2” then trimmed it down to 3 3/4” x 5”. It was matted with  tropical green print paper.  The sentiment was cut using a Poppystamps Thanks outline die with the shadow in a sage cardstock and the letters in a light green glitter cardstock that I had in my stash. I finished it off with some green glitter enamel dots.  

Multi Metallics

Image
I worked on multiple cards this weekend, all inspired by this video by Jennifer McGuire. I started out with 4 different metallic cardstocks but only 3 turned out well enough to use.   For the striated silver cardstock I used the Altenew Floating Foliage 3D embossing folder and Catherine Pooler Seafoam ink. The sentiment was made using The Ton Script Word dies.  The frame is from the Altenew Mix and Match Frames die set.   For the Navy shimmer cardstock, I used the Altenew Charming Mandala 3D embossing folder and Catherine Pooler Juniper Mist ink.  The sentiment is from an old Happy Birthday die from my stash.  For the other components I used a Leafy Branch background die and Crystal Frames die from Memory Box.   For the silver cardstock I used the Typewriter 3D Texture Fades Sizzix embossing folder and Soft Granite ink from Hero Arts.  The sentiment is from The Ton Script Word dies.  The frame was made using a double stitched frame set from my st...

Easter Time

Image
I had some backgrounds I created last year and never used so I decided to use them for my Easter cards.  The technique was one I used for Valentine’s Day last year.  It’s from a tutorial by Bibi Cameron .  This time I used blues with neutrals and as a final step swiped over the top with Champagne Delicata ink.  The embossing folder is the Memory Box 3D Blooming Sweet Pea.  The inks I used were Distress Oxide inks in, I believe (it was last year) Chipped Sapphire, Stormy Sky, and Black Soot, and sprays in Antique Linen and Speckled Egg.   The Easter Lily stamp and die were from Newton’s Nook .  I stamped them on Neenah Solar White cardstock using My Favorite Things Extreme Black hybrid ink and colored them in using Copic markers.  Next I die cut them using the matching die.   The sentiment is a die set from my stash.  I cut the words from champagne glitter and white cardstock so I could layer them to create some depth.  The shadow wa...

Geometric Layers

Image
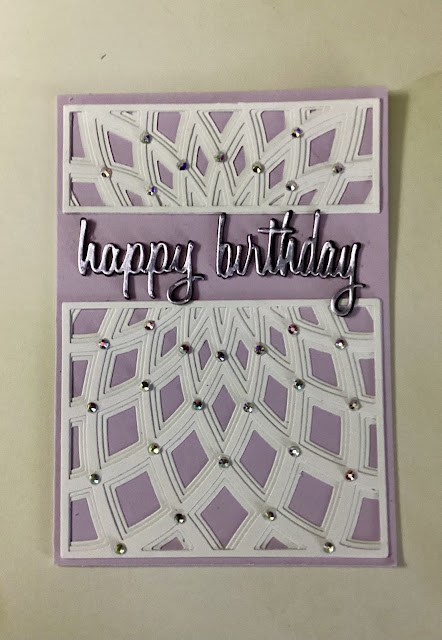
Birch Press has some really great layering dies and I loved the Dazzle Bevel Layer Set when I saw it.  There are two sizes you can use separately or together.  I used them together here.  I’m always looking for designs I can use for unisex or male cards.  I love flowers but you just need other designs as well.  You could use different colors for the 3 layers but I just used white for all of them this time.  I made 2 cards, one with a navy card base and one in lavender.  I used A6 bases because I already had them ready and I wanted a color border all the way around.  The dies are A2 size.  If you put them on an A2 base they go right to the edges.  I was going to use black sentiments for both, and cut enough for both cards, but it just didn’t show up on the navy so I cut white instead. I decided I wanted silver on both, so even though I had them finished with 3 layers on each sentiment I went back and added it on.   To add a little s...

Abstract Colors

Image
I just saw a Jennifer McGuire video  about heat embossing that showed a technique I wanted to try.  I’ve done emboss resist with inks before but not using the Lindy’s Magicals, of which I have 2 different sets (and I want to get more because I love them).   I cut a 9x12” sheet of Canson XL watercolor paper into 4 pieces. On 2 of them I used the Taylored Expressions Triangle Tetris background stamp with Versamark ink and heat embossed using Stampendous detail clear powder.   The two Lindy’s Magicals sets I have are Nantucket Pearls and Industrial Chic .  After taping down the paper, one for each set, I spritzed them with water, sprinkled on the powders, and spritzed again.  The one above used the Nantucket Pearl powders and the one below used the Industrial Chic powders. The sentiment strips were cut from black glossy cardstock.  The dies were from Aliexpress.  I thought the kind of graphic industrial look went really well with the design. I kept...

Triple Pink Heart

Image
Birch Press has such beautiful layering dies.  For my Valentine’s cards I chose their  Flora Heart Layer Set and to use Altenew’s Pink Brilliance Glitter Gradient cardstock .  The cardstock is only 3” x 6” but that allowed me to cut 2 from each piece.  This glitter cardstock was great, it cut like a dream.  I used the Pink Diamond, Tourmaline, and Rhodolite.  I also cut a thin strip of the Pink Diamond to put on the side. The Love You sentiment die was from CZ Design .  I cut the shadow from vellum and the words from the Rhodolite glitter cardstock.   The background was embossed using the Sizzix Organic Petals 3-D embossing folder .  I cut it a bit smaller than the card blank and the cut a 1/4” strip off the side to add the glitter strip. The card blanks and envelopes I used were from Sizzix Surfacez in Ballet Pink.   I love the way this card turned out, don’t you?  I’m going to enter it in the Simon Says Wednesday Challenge and ...

Thankful

Image
I just finished my Thanksgiving cards (I know, a bit late). I’m a bit disappointed because I had planned on adding a background of gold foiled fall leaves but couldn’t because it turns out that the Glimmer system can’t be used with the Cuttlebug.  It doesn’t fit.  That’s also why my cards are running late.  My Glimmer machine didn’t get here until Saturday and then when it didn’t work I had to figure out something else for the background. I ended up using a pierced background die.   They’re still cute aren’t they?  The pumpkin dies are from AliExpress, the background die is Simon Says Stamp Detail Petal plate, and the sentiment is from Aliexpress too.   Thanks for stopping by! 

Purple Sympathy Card

Image
I needed to make a sympathy card so I pulled out my Altenew Pattern Motif Die Set.  I hadn’t used it yet and I thought it would make a pretty & easy card.  The patterns were cut using lavender and metallic lilac cardstock.  One note - it was difficult to get the cut cardstock out of the dies in one piece.  The lavender tore but you can’t really tell once it was all glued together.  Next time I’ll use waxed paper too and see if it helps.   It was a little tricky to get it all lined up and the little bits where they were supposed to go, but no worse than most layered flower dies.  I glued the 2 layers together and figured out how I wanted it to fit on the A6 dark purple card front.  This motif is larger than an A2 or A6 card, so it hangs over the edge.  I glued it to the card front and, once dry, trimmed the edges.   I white heat embossed the sentiment, added a few clear drops, and it was done.  Didn’t it turn out pretty? I’ll def...

Spookiest Time of the Year

Image
 I finished my Halloween cards this week.  I’ve been neglecting my card making lately because I’m finally working on my honeymoon scrapbook. It’s only been 3 years…lol. This cute stamp & die set is from Simon Says.  I colored the images using Copic markers and used a white belly pen to add the accents.  There are black rhinestones to add a little glimmer.   That’s all for today!  I’ll be entering these in the Simon Says Monday and Wednesday challenges. Thanks for stopping by! 

Sympathy & Blues

Image
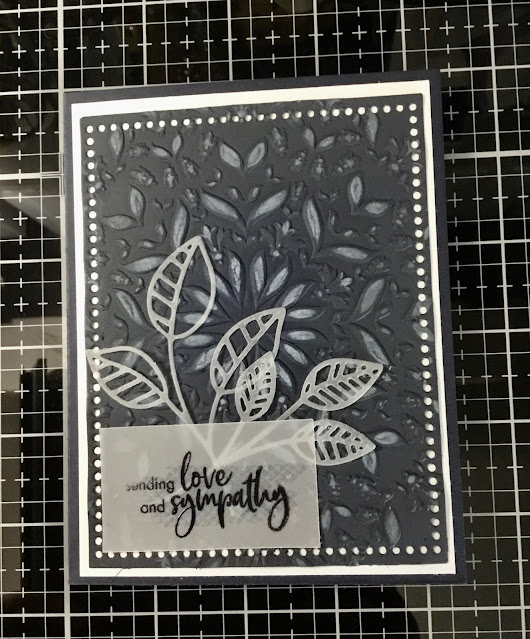
Recently, I’ve needed a couple of sympathy cards, unfortunately, so my stash is gone.  I made 2 of the same thing to save some time to replenish it.  I started with navy blue cardstock cut to 5.5”x4.25” and blended some Distress Oxide Black Soot around the outside to create a bit of shadow. I wiped the back with a baby wipe and ran them through my Cuttlebug using an Altenew Charming Mandala embossing folder. Next I used a brayer and some Hero Arts Unicorn ink lightly across the top to highlight the design. Afterwards I die cut them with an Altenew Mix and Match frame die.  Using some vellum I also die cut some leaves using Altenew's Flowing Foliage set. I used a sentiment from the Hero Arts Protea Flower set, stamping on some vellum with black archival ink and embossing with clear powder.  I used a white mat on a navy card base and attached the embossed background. Last I attached the vellum leaves and sentiment with a tape runner.  These turned out really well!...

Stars & More Stars

Image
  I decided to go with a theme of stars and to make my first shaker cards for the 4th. I found the small star shaker dies and the Paper Rose Star texture die and thought I could do something with them. This is what I came up with.  They look deceptively simple, but I cut 120 of the stars out which took a looonng time. The little stars inside came from Buttons and Things. Aren’t they cute? They sealed the idea for me.   I’ll be entering this in the  Simon Says Stamp Monday Challenge - Simon Says: Something Beginning With ‘S’ , Simon Says Stamp Wednesday Challenge - Simon Says: Clean And Simple , and the DRU Challenge #195 . Thanks for stopping by!

Father’s Day 2022

Image
For Father’s Day this year I pretty much copied a card from   Norene Borys for Altenew . It involved some techniques I haven’t used before and I learned a lot. It actually took me 3 tries to get them to turn out good enough to send. Here’s mine: I haven’t done much with masking before, so this was a learning experience. It wasn’t as difficult as I thought it would be.  I’m not much of an artist, so the extra leaves & the watercoloring aren’t as good as I’d like, and I didn’t add any sketching on the bird itself. It’s a cute stamp, and overall I’m happy with how it finally turned out.  I’ll be entering this in the  Simon Says Stamp Monday Challenge - Simon Says: It’s Up In The Air , the Simon Says Stamp Wednesday Challenge - Simon Says: Little Critter s, and the Stamping Sensations June Challenge- ****Make it Masculine**** . Thanks for stopping by!

Bright Flowers

Image
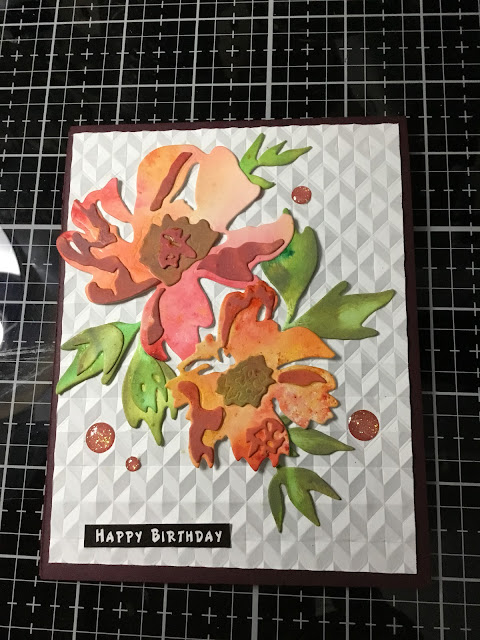
The Simon Says challenges for the week were  Simon Says Stamp Monday Challenge - Simon Says: Add Texture and  Simon Says Stamp Wednesday Challenge -  Simon Says: Layer It Up , so I created another card that I could use on both. I recently got the Sizzix Brushstroke Flowers #1 Thinlits Die Set and decided to use some of my Brushos with them.  I used three 4.5”x6” pieces of watercolor paper and sprinkled one with greens, one with reds & oranges, and the third with oranges and yellows, then spritzed them with water. I let the colors swirl around a bit then let them dry overnight.  The next thing I did was use the dies to cut the leaves from the green, the large flower from the red, and the smaller flower from the orange paper. I colored some of the pieces with Distress Oxides using small sponge blenders and then glued them all together. Using the Altenew Angled Mosaic embossing folder, I embossed a piece of A2 cardstock and trimmed it down 1/4”. I then attache...

Pretty in Pink

Image
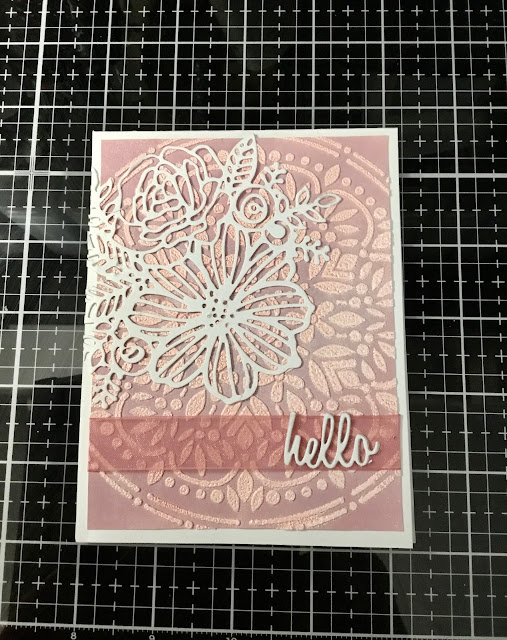
For the  Simon Says Stamp Monday Challenge - Simon Says: Add Texture I decided to use a stencil and modeling paste to create texture. I’ve had some good luck with adding embossing powders to the modeling paste, getting really interesting looks. I looked through my embossing powders and found a Ranger Blush Pearl powder that I don’t think I’ve used before, so I went with it. I’m trying to go through my supplies and use things I haven’t used before. On that same note, I have a Simon Says Stamp stencil, Spring Boho Circle, that I haven’t used before either, so took that out. I began with a piece of 4.25 x 5.5” white cardstock and blended Distress Oxide Victorian Velvet over it. Next I spritzed some water on it and dried, then spritzed some Avery Elle shimmer spray over it and dried. That gave me a shimmery textured background which I taped my stencil over, then spread Liquitex light modeling paste over the stencil using a palette knife. When I removed the stencil I had the stencil...

Memorial Day 2022

Image
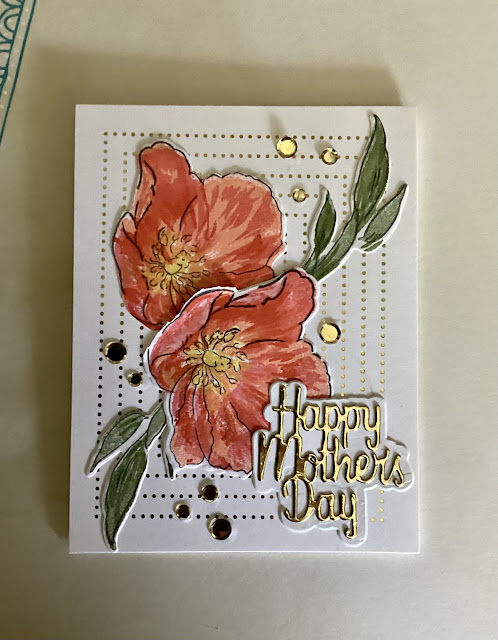
I love poppies! So when it comes to Memorial Day I tend to turn to them. This year I used Paper Rose’s Modern Poppy stamp.  Since I was making multiple cards, and I didn’t want to use up my Copic markers, I purchased the Nuvo  Creative Pens Rich Reds set on sale. It’s a good thing since I used them all up. Now, I did a number of things wrong here. First I stamped the design using Ranger Archival Ink in black. I used clear embossing powder over that, so here are 2 no-no’s. Archival ink is a pigment ink so it’s not safe for alcohol ink markers, it will smear, and you’re not supposed to use markers with heat embossing as it can ruin your markers. I hoped the clear embossing would help prevent the smearing, and it did for the most part. Also, I wasn’t planning on keeping the red markers so I didn’t care so much about the embossing.  I did use my Copics for the greens and yellow and they seem to be ok.  The paper I used was Hammerhill Premium Color Copy 80lb. Cover. ...

Happy Cats

Image
I needed a masculine birthday card so, after looking through my collection, I decided to use an argyle stencil set from Pinkfresh Studios, and a Stampendous Laurel Burch stamp. For the argyle stencil I used Distress Oxide inks in Faded Jeans, Weathered Wood, and Shabby Shutters. It turned out smaller than I thought it would but you could go back and move the stencils over to make it a bigger size if you wanted to.  I decided to use it as a focal element instead of a full background so it was fine.  I stamped both the single and triple cats from the Stampendous stamp set “Feline Blooms, and the Happy Birthday sentiment as well, using Ranger Archival ink in black. I colored in the cats using Copic markers and then fussy cut them. I trimmed the sentiment into a strip.  On an A2 medium gray card base, I used a tape runner and attached the argyle mat. The cats were mounted using foam dots, and then the sentiment strip with tape runner. I added some enamel dots in several color...

Mother’s Day 2022

Image
My Mother’s Day card for my MIL turned out pretty, but not what I wanted. There was supposed to be another die cut floral arrangement to add but the die didn’t work right, so I added a few more flowers and some sparkly enamel dots.  Using the flower & leaf stamps from the Stampin Up Artistically Inked bundle I stamped and cut them with the matching dies. I then used a wood grain background stamp on a piece of cardstock and cut it using a die from the Altenew Mix & Match Frames set. The sentiment comes from the Hero Arts Protea Flower set.  I’m entering this in the Simon Says Monday Challenge:  Simon Says: Wild and Wonderful , the Simon Says Stamp Wednesday Challenge - Simon Says: Anything Goes , the Stamping Sensations April Challenge- "I love......" , and the MFT Color Challenge 188 . Thanks for stopping by!

Shaded Sympathy

Image
A coworker just lost a beloved family pet, so I made a sympathy card for her. It was pretty simple but turned out pretty.  I silver heat embossed a card panel using the Simon Says Flowers Background, then blended on Hero Arts Shadow Inks in Soft Granite, Soft Yellow, and Soft Pink. I did the same with the sentiment and cut it out.  After gluing the sentiment onto a scrap of vellum and trimmed it to leave a border.  I die cut a number of leaves in vellum and used a tape runner to stick them on under the sentiment. I trimmed the card and attached it to a white card base.  That’s it!  Thanks for stopping by! 

Lovely Lilacs

Image
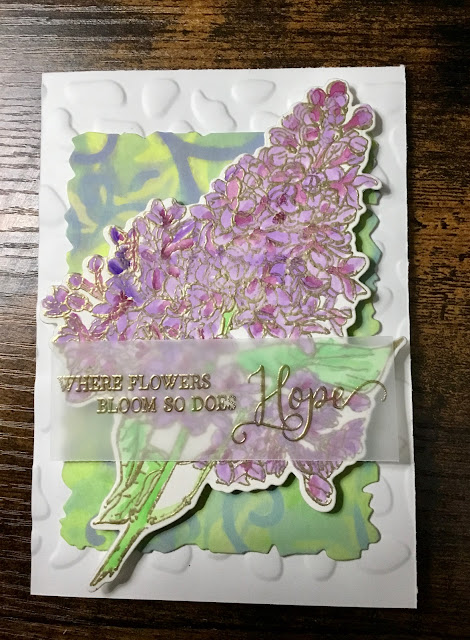
I finally finished my springtime cards and they turned out awesome! Here’s a picture. I love the lilacs in the springtime, and that luscious smell, so when I saw the Colorado Craft Big Lilac stamp & die set I knew I had to get it. I like to do a springtime card to send out to friends and family, and this was perfect.  For this card I began by embossing the stamp in gold on watercolor paper and then, using my mini watercolor set, painted it.  When dry I cut it out using the coordinating die.  The inked background was a lot of fun. I wanted something many layered and indicative of springtime growth. I used 4.5”x6” pieces of watercolor paper (9x12 sheets cut in quarters) and blended Distress Oxide inks in Twisted Citron and Mowed Lawn diagonally across, covering the sheets. I spritzed water on them and let them dry. Next, using Pixie Spray, I put the Lavinia Stamps Ivy stencil over top and through the stencil blended DO Speckled Egg over the Twisted Citron, and Tumbled G...